
This post will describe the process of automatic matching a client credit note with an invoice.
- Create a client invoice with some details attached to it.
- For each invoice detail do the following:
- Click on the Edit button
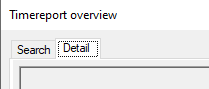
- Click on the Timereport billing button, then the Timereport overview screen is displayed:
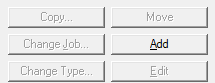
- Click on the Add button to create a timereport:
- Fill the timereport and return to the Timereport overview screen. In the grid, a new line should be displayed for the newly created timereport:

- If the timereport has been billed then you should change its status selecting billed in the combobox and clicking on the Update button.

The change will be reflected in the grid: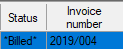
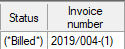
- Now go to the Search tab, change the view to Billed on this Invoice detail and click Refresh.

- Go back to the Detail tab where you should see that the timereport is linked to the invoice detail:
- Click on the OK button so you come back to the Invoice detail screen. On that screen click Edit to save the changes.
- Close the Invoice detail screen.
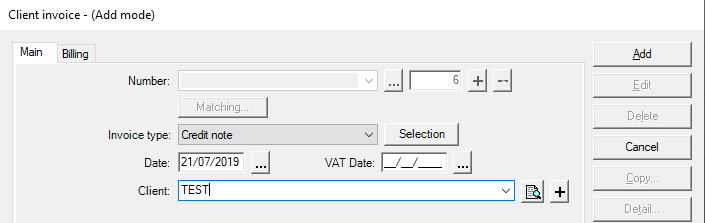
- Now we will create a credit note for the same client.
- On the Main invoice screen, click Add and select the invoice type:
- Click on the Selection button to open the Select Timereport for Credit note/Provision screen:

- Click on the + sign to expand the line and select the checkbox to select all the invoice detail lines:

- Click OK to return to the Credit note main screen.
- To finalize the creation of the Credit note, click on the Add button and if you have signed the Credit note then the following message will ask you if want to match the credit note automatically with the selected invoice:
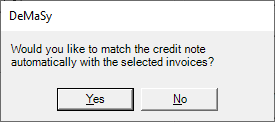
- Click Yes if you want to match now.
- If you did not sign the credit note then you will need to match manually by clicking on the Matching button:

- On the Main invoice screen, click Add and select the invoice type: